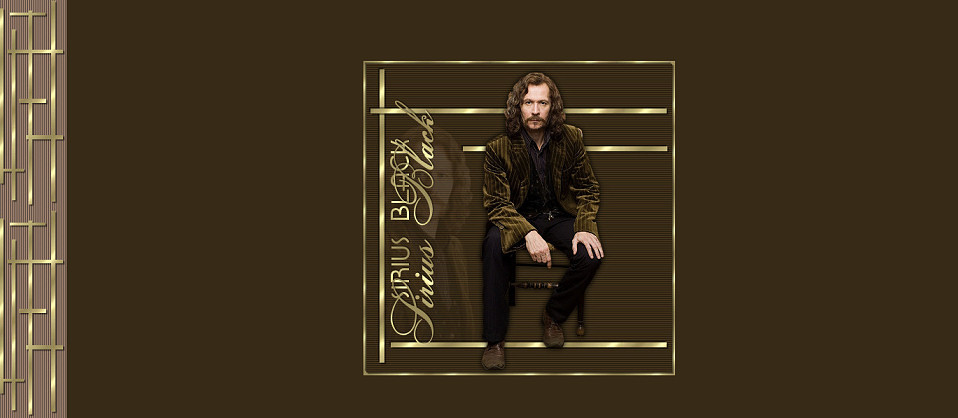
Gold Is Elegant Stationery Tutorial
Gold Is Elegant Stationery Tutorial:


Things Needed:
*Paint Shop Pro (This is done using 9)
*Supplies (Selections and Gold Pattern) Found Here
(Export the selections into your Selections folder in PSP and The Gold Pattern into your Patterns Folder in PSP)
*Tube/Tubes of Your Choice (Should be no bigger than 400 in width or height)
Let's Make Your Header:
1. Open your tube in PSP and choose 2 complimenting colors from it (One lighter and One darker) You can minimize your tube for now....
2. Open a new image 500x500
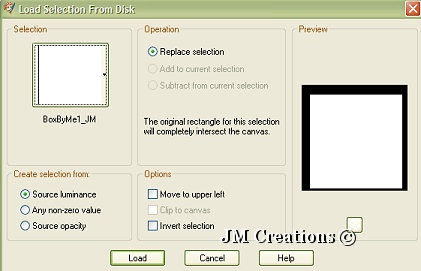
3. Selections/Load-Save Selection/Load Selection From Disk and choose the BoxByMe1_JM Selection:

4. Layer/New Raster Layer
5. Flood Fill with your Dark Color
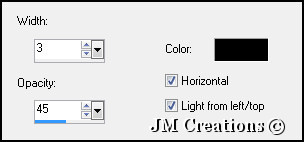
6. Effects/Texture Effects/Blinds with the following settings: Width 3, Opacity 45, Horizontal and Light from Left/Top boxes checked, Color Black
5. Flood Fill with your Dark Color
6. Effects/Texture Effects/Blinds with the following settings: Width 3, Opacity 45, Horizontal and Light from Left/Top boxes checked, Color Black

7. Effects/3D Effects/Drop Shadow with the following Settings: Horizontal and Vertical at 2, Opacity 50, Blur 2
8. Repeat Drop Shadow except change the Horizontal and Vertical to -2
9. Selections/Select None
10. Selections/Load-Save Selections/Load Selection From Disk and choose the VerLineByMe1_JM Selection
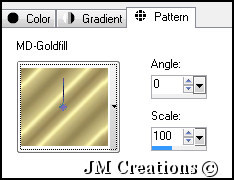
11. In your Color Palette, Change your Background to your Gold Pattern Fill:
8. Repeat Drop Shadow except change the Horizontal and Vertical to -2
9. Selections/Select None
10. Selections/Load-Save Selections/Load Selection From Disk and choose the VerLineByMe1_JM Selection
11. In your Color Palette, Change your Background to your Gold Pattern Fill:

12. Layers/New Raster Layer
13. Flood Fill your Selection with your Gold pattern
14. Effects/3D Effects/Drop Shadow and use these settings: Horizontal and Vertical 2, Opacity 50, Blur 2, Color Black
15. Repeat Drop Shadow but change the Horizontal and Vertical to -2
16. Selections/Select None
17. Selections/Load Save Selections/Load Selections From Disk and choose the HorLinesByMe1_JM Selection
18. Layers/New Raster Layer
19. Flood Fill with your gold pattern
20. Effects/3D Effects/Drop Shadow with the same settings we used last
21. Repeat Drop Shadow and change the Horizontal and Vertical to 2
22. Selections/Select None
23. Layers/Merge/Merge Visible
24. Edit/Copy
25. Edit/Paste/Paste As A New Image
26. Layers/New Raster Layer
27. Flood Fill with your Gold Pattern
28. Layers/Arrange/Send To Bottom
29. Layers/Merge/Merge Visible
30. Now it's time to use the tube/tubes that you minimized earlier...Open your tube and Edit/Copy
31. Back to your Header and Edit/Paste/Paste as New Layer and using your mover tool, position your tube/tubes where you'd like them.
32. Time to add a drop shadow to your tube (If you use more than one tube, you will have to add this drop shadow to each of them)
Go to Effects/3D Effects/Drop Shadow and use the following settings: H&V=0, Opacity=100, Blur=12, Color=Black
33. When you have your tubes positoned to where you like them, Add your watermark and text if you'd like. If you add text, you can add a drop shadow of your choosing or use the following settings: H&V=1, Opacity=50, Blur=2, Color=Black
34. Layers/Merge/Merge All (Flatten)
35. Time to save so go to File/Export/JPEG Optimizer and Optimize at 15 or whatever works best for your graphic...Name your Header and Save
Let's Make The Background:
36. Open a new image 100x300
37. Flood Fill with your Light Color
38. Effects/Texture Effects/Blinds and we will be using the same settings as before except make sure the Horizontal box is Not Checked
39. Selections/Load Save Selections/Load Selection From Disk and choose the SideLinesByMe1_JM Selection
40. Layers/New Raster Layer
41. Flood Fill with your Gold Pattern
42. Effects/3D Effects/Drop Shadow and use the following Settings: Horizontal and Vertical 2, Opacity 50, Blur 2, Color Black
43. Selections/Select None
44. Image/Canvas Size and make your new size 1400x300 and for the placement choose Middle Left Arrow
45. Layers/New Raster Layer
46. Flood Fill with your Dark Color
47. Layers/Arrange/Send To Bottom
48. Layers/Merge/Merge All (Flatten)
49. File/Export to JPEG Optimizer and Optimize at 15...Name it and save it..
50. Arrange in Letter Creator and You are done :0) Please Credit Tutorial back to me at
I hope you enjoyed my tutorial...
Please feel free to snag and share my tutorials after they have been released but please credit back to me in the footer..
If you are a tutorial writer and you would like to use my selections, masks, tubes or other things please email me at jodimcreations@gmail.com
I do allow it, but I require credit and a link back to me at my website here:
http://www.jmcreationtuts.iwarp.com
Thanks!!
Thanks!!
Jodi M