Windy Distortion Effects SB Tutorial
Windy Distortion Effects SB Tutorial
Click Here to download Tutorial


Things Needed
1. Open tube in PSP, Duplicate once and close out original...
2. Resize your tube so it's no wider than 350 pixels. If your tube is 350 pixels or less you can skip this resizing
3. If you resized it, you will need to sharpen it, so go to Adjust/Sharpness/Sharpen
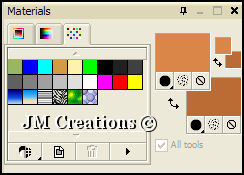
4. Choose 2 colors from your graphic..A dark one for your Background and a lighter one for your foreground. Two colors that are from the same color group will work best....Mine are below:
5. Duplicate your tube once and minimize one for now...
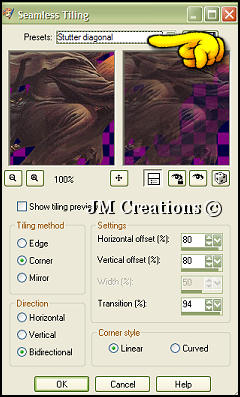
6. Effects/Image Effects/Seamless Tile
and tile using "Stutter Diagonal"
7. Effects/Image Effects/Seamless tiling and use the "Stutter Vertical" setting this time..
8. Effects/Image Effects/Seamless Tiling and use the "Default" setting this time..
9. Effects/Distortion Effects/Wind and use From Right and 100 strength
10. Effects/Image Effects/Seamless tiling and Tile at Default
11. Layers/New Raster Layer
12. Flood fill this new layer with your light color
13. Layers/Arrange/Send to bottom
14. Take note of the height of this image...We will need it in a minute :0)
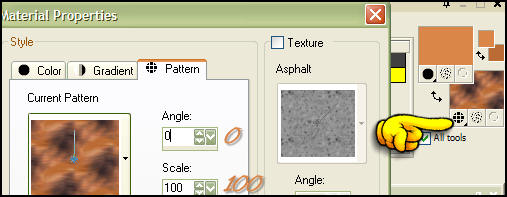
15. Change your background color to pattern and find the image you just made....Angle 0 and Scale 100
**You can then minimize this image**
16. Open a new image 1400x the height of your graphic
17. Right click and fill with your pattern
18. Effects/Edge Effects/Enhance
19. Layers/New Raster Layer
20. Flood Fill with your light color
21. Lower the opacity of this layer to anywhere between 30 and 40 (mine is at 30)
22. Layers/Merge/Merge Visible
23. Bring up your tube you minimized earlier and go to Edit/Copy
24. Back to your background image and Edit/Paste/Paste as a new layer
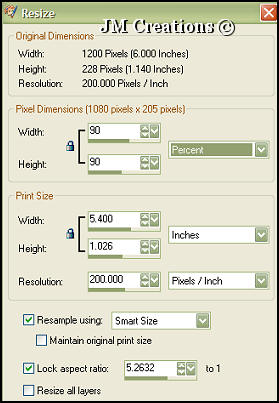
25. Image/Resize and resize down 90%..
Make sure "All Layers" is NOT checked.
26. Adjust/Sharpness/Sharpen
27. Effects/3D Effects/Drop Shadow
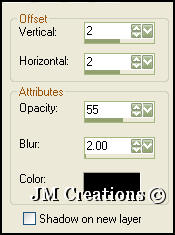
28. Layers/Duplicate
29. Effects/Distortion Effects/Wind using same settings as earlier (From Right/100 Strength)
30. Effects/Edge Effects/Enhance
31. Layers/Arrange/Move Down
32. Close out your bottom background layer by clicking on the eye
33. Highlight your top layer and go to
Layers/Merge/Merge Visible
34. Make your bottom layer visible again
35. Move your tube over to the left side of your image using the mover tool...
36. Optional....Adjust/Sharpness/Sharpen
37. Layers/Merge/Merge Visible
38. If you'd like to add text to it, you can do so and use the same drop shadow we used earlier or one of your choosing...
39. Layers/Merge/Merge All Flatten
40. File/Export/JPEG Optimizer and optimize at anywhere from 15-25, Save it
and it's ready to use in Letter Creator.
Please make sure to credit the tutorial back to JodiM at:
Please feel free to snag and share my tutorials after they have been released but please credit back to me in the footer..
If you are a tutorial writer and you would like to use my selections, masks, or other things please email me at jodim@norwaymi.com
I do allow it, but I require a link back in your tutorial to my website here:
Jodi M