Dazed And Selected Tutorial
Dazed And Selected Stationery Tutorial
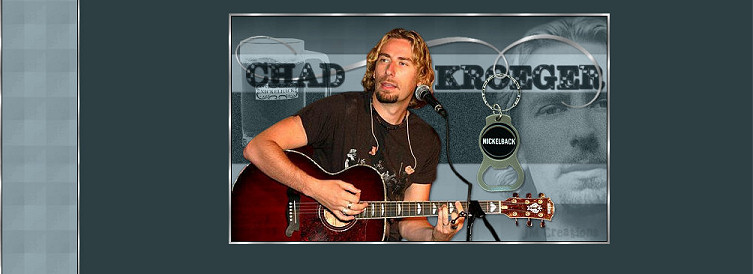

Things Needed
Unzip the selections and extract them to your PSP/Selections folder...
And extract the Silver/and or Gold pattern fill to your PSP/Patterns folder...
Let's Get Started!!
1. Open tubes in PSP
2. Choose 2 colors from your main tube. This will be the tube that will be your main focal point....
Choose a light color for your foreground and a dark color for your background
**You can now minimize your tubes**
3. Change your Foreground color to Gradient/Foreground-Background: Angle 0 and Repeats 2 and Style is Linear
4. Open a new image 500 x 300
5. Flood fill with your Gradient
6. Effects/Texture Effects/Texture/Daze
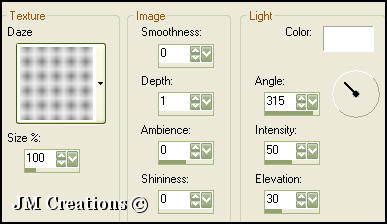
7. Repeat the Effects/Texture Effects/Texture/Daze
8. Layers/New Raster Layer
9. Selections/Load-Save Selections/Load From Disk and choose the MiddleSelected_JM selection
8. Layers/New Raster Layer
9. Selections/Load-Save Selections/Load From Disk and choose the MiddleSelected_JM selection
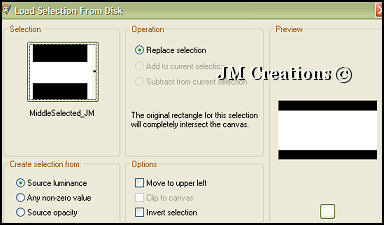
10. Flood fill with your light color
**You will have to change your gradient back to your solid light color**
11. Effects/Texture Effects/Texture/Daze and use the previous settings
12. Effects/3D Effects/Drop Shadow
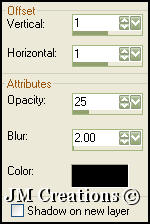
13. Repeat the drop shadow but change the V&H to -1
14. Selections/Select None
15. Layers/New Raster Layer
16. Selections/Load-Save Selections/Load From Disk and choose the MiddleSelected2_JM selection
17. Flood fill with your dark color
18. Selections/Select None
19. Adjust/Add-Remove Noise/Add Noise
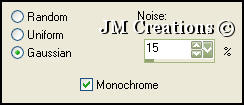
20. Effects/3D Effects/Drop Shadow and use the same settings we used before
21. Repeat drop shadow but change the V&H to -1
22. Layers/New Raster Layer
23. Selections/Load-Save Selections/Load From Disk and choose the FancyScroll_JM selection
24. Flood fill with your Silver or Gold Pattern
25. Effects/3D Effects/Drop Shadow with the following settings:
V&H 2, Opacity 25, Blur 2
26. Bring your tubes back up and postion them where you'd like them. One or two should be blended into the background. To do this you change the blend mode to Luminance Legacy and lower the opacity to your liking. I lowered mine to 40
27. You can also move these layers down so your scroll is on top...
But make sure your main tube is the top layer because we want this layer in front of all the other layers....
**Optional...You can add a drop shadow to your main tube or all of your tubes if you wish to...You can use the settings we used last or one of your own**
28. You can add text if you'd like to and experiment with different blend modes also...Just make sure your main tube remains the top layer...
29. Layers/Merge/Merge Visible
30. Add your watermark
31. Image/Add Border and add a 1 pixel border in black
32. Image/Add Border and add a 3 pixel border in white
33. Select white border with your magic wand and flood fill with your silver or gold pattern
34. Selections/Select None
35. File/Export/Export to JPEG Optimizer and optimize somewhere between 15 and 20
The Background:
1. Open new image 100x300
2. Flood fill with your light color
3. Effects/Texture Effects/Texture/Daze using the same settings as we did earlier
4. Repeat the Daze texture
5. Image/Add Border and add a 1 pixel border in black
6. Image/Add Border and add a 2 pixel border in white
7. Select the white border with your magic wand
8. Flood fill with your silver or gold pattern fill
9. Effects/Image Effects/Seamless Tiling and make sure Edge and Vertical are checked...
10. Layers/Promote Background Layer
11. Image/Canvas Size 1400x306
(If your screen resolution is larger than 1400 than you can adjust this number to suit your needs)
12. Layers/New Raster Layer
13. Layers/Arrange/Move Down
14. Flood fill this layer with your dark color
15. File/Export to JPEG Optimizer and optimize at between 15 and 20
Arrange in Letter Creator and Credit Tutorial back to Jodi M at:
Thank you to my testers at Crazy Creative Creators!!
I hope you enjoyed my tutorial :0)
Please feel free to snag and share my tutorials after they have been released but please credit back to me in the footer..
If you are a tutorial writer and you would like to use my selections, masks, or other things please email me at jodimcreations@gmail.com
I do allow it, but I require a link back in your tutorial to my website here:
Thanks!!
Jodi M