Criss Cross Frames Tutorial
Criss Cross Frames Tutorial

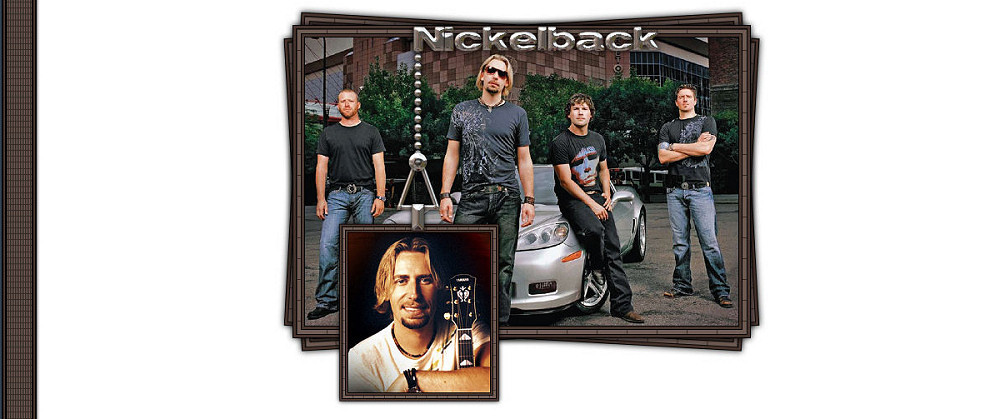
Things Needed
 Paint Shop Pro (This was done using 9)
 My Supplies (These were made by me. Please keep file names intact) You can also download these
at the link above with the Tutorial in Incredimail form....
 Tormentia (Criss Cross) Plugin that can be found Here
 Eye Candy 4000 - Chrome (which I used for my lettering)
  Two graphics of your choice
**The first graphic needs to be between 500 - 520 pixels wide (and no taller than 350 pixels in length)
**The second graphic should be no larger than 245 wide x 275 tall
 Font I used was ReservoirGrunge Found Here
Please have your plugins installed in PSP before starting...
**All settings remain the same unless otherwise stated**
Let's Get Started...
1. Open Supplies and your 2 graphics in PSP
2. You can minimize all but your wider graphic for right now. With your wider graphic active, Edit/Copy - Edit/Paste/Paste as a new image and you can close out the original...
3. This graphic needs to be between 500 and 520 pixels in width. The height should be no longer than 350 pixels.
If it is larger than the needed dimensions, you can resize by going to Image/Resize...or if you are advanced you can crop your graphic so it meets these dimensions.
If you resized, you may need to go to Adjust/Sharpness/Sharpen
4. Choose 2 colors from your graphic. One darker and one medium or lighter in color.
(What I do is to make it easier on myself, I open a new image 100x100 and flood fill with my dark color. Open another new image 100x100 and flood fill with my second color. I then keep these in my top left hand side work space in PSP for when I need them)
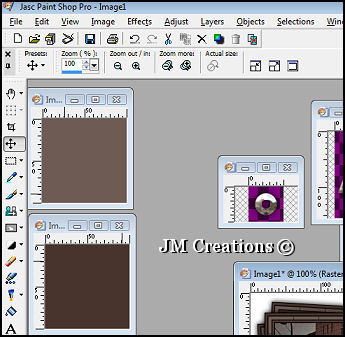
5. With your graphic active, go to Image/Add Borders and add a 1 pixel black border
6. Image/Add Borders and add a 3 pixel border in your dark color
7. Image/Add Borders and add a 1 pixel black border
8. Image/Add Borders and add a 5 pixel border in your medium color
9. Select your 5 pixel border using the magic wand tool:
6. Image/Add Borders and add a 3 pixel border in your dark color
7. Image/Add Borders and add a 1 pixel black border
8. Image/Add Borders and add a 5 pixel border in your medium color
9. Select your 5 pixel border using the magic wand tool:

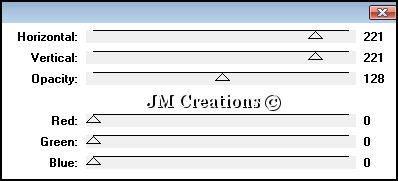
10. Effects/Plugin Effects/Tormentia/Criss Cross at the settings below: After you've applied these settings you can select none...
11. Image/Add Borders and add a 1 pixel black border
12. Image/Add Borders and add a 3 pixel border in your dark color
13. Image/Add Borders and add a 1 pixel black border
14. Layers/Promote Background Layer
15. Image/Canvas size and canvas size it 600x600 (placement= middle)
16. Effects/3D Effects/Drop Shadow:
H&V=0, Opacity=100, Blur=12, Color=Black
17. Layers/Duplicate
18. Layers/Arrange/Send To Bottom
19. Using your raster deform tool, turn this layer a little bit to the left:
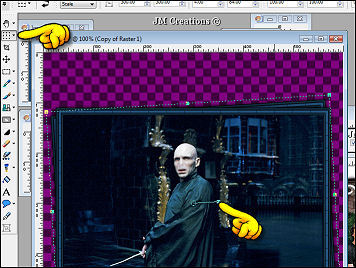
20. Click on your move tool (we need to get it off the raster deform tool it is on right now)
21. Layers/Duplicate
22. Image/Mirror
23. Layers/Merge/Merge Visible
24. Now make your second graphic active.
Duplicate and close out original...
We are going to add the same borders to this as we did to the first graphic...So please add:
1 pixel black border
3 pixel dark color
1 pixel black
5 pixel medium color
25. Select 5 pixel border using magic wand tool and apply the Tormentia/Criss Cross settings (and select none)
26. Add a 1 pixel black border
3 Pixel dark color border
1 Pixel black border
27. Image/Resize and resize 70 percent
Depending on the size of your graphic, you may need to either resize less or more...You will have to adjust it to what looks best for your graphic...
You may also need to sharpen after you have resized..
28. Edit/Copy (You can now minimize this..I wouldn't close it out until you know for sure you are happy with the resize)
29. Making your first graphic active go to Edit/Paste/Paste as a new layer
30. Effects/3D Effects/Drop Shadow
31. Arrange where you want this small picture and once you do that, you can add the Pic hanger, chain, and fastener. The Pic hanger and Fastener need to be resized 70 percent....make sure you sharpen after resizing them also.
32. You can add text to the top of your graphic to make it look like the chain is coming off it. What I did was I typed out my text using black and then added the chrome effect in Eye Candy 4000 (Your text must be converted to raster layer before applying the plugin)
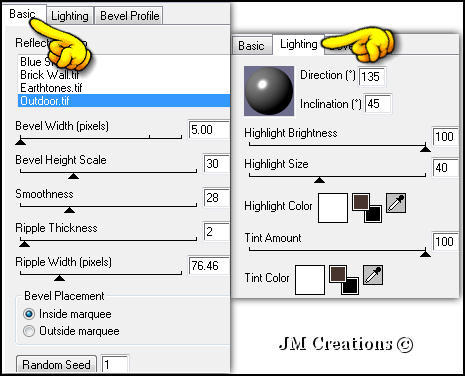
33. After you have your text placed and have added a drop shadow to it, you can make the chain layer active and remove any excess that may be there..
34. When you have everything where you are happy with it, go to Layers/Merge/Merge Visible
35. Edit/Copy and then Edit/Paste/Paste as a new Image (This has cropped your image for you)
36. Layers/Add a new raster layer
37. Move this layer to the bottom and flood fill with either white or one of the colors you chose from your graphic
38. Add your watermark to this and then
go to Layers/merge/merge visible..
Export it to the JPEG Optimizer and optimize at 20 and save it...
Background
1. Open new raster image 30x100 and flood fill with your dark or lighter color..
(If you are not going to have a white background and you are using one of your chosen colors as your background, then you should flood fill this with your other chosen color...)
If you are using a white background, then the choice is yours...it won't matter :)
2. Effects/Plugin Effects/Tormentia/Criss Cross
3. Effects/Image Effects/Seamless Tile
Tile using Corner and Vertical
(Some colors, especially lighter ones are not going to tile totally seamless. There may be horizontal black lines in it...If you
think this looks ok you can leave it, after seamless tiling it once. Otherwise you can try seamless tiling it a few times. The choice is yours) Personally, I don't mind the black lines and I think they look fine on the side border :)
4. Image/Canvas Size and make it 34x100
Placement is in the Middle
5. Layers/New raster layer
6. Layers/Arrange/Send to Bottom and flood fill with black
7. Image/Canvas Size and make it 38x100 placement in the middle
8. Add a new layer, send to the bottom and flood fill with your dark or light color
(The opposite color you chose for background step 1)
9. Image/Canvas Size and make it 42x100 placement in the middle
10. Add a layer and send to the bottom. Flood fill it with black
11. Layers/Merge/Merge Visible
12. Image/Canvas Size and make it 1400x100 (Placement is left middle arrow)
13. Effects/3D Effects/Drop Shadow..
Make sure Shadow on a new layer is checked
14. Effects/Image Effects/Seamless Tile
15. Layers/Merge/Merge Visible
16. Layers/Add New Raster Layer and send it to the bottom
17. Flood fill with white or whatever color you used as the background for your header...
18. Layers/Merge Visible, Export and save...
Arrange in Letter Creator and you are done!!
Please make sure to credit the tutorial back to JodiM at:
Please feel free to snag and share my tutorials after they have been released but please credit back to me in the footer..
If you are a tutorial writer and you would like to use my selections, masks, or other things please email me at jodim@norwaymi.com
I do allow it, but I require a link back in your tutorial to my website here:
Jodi M