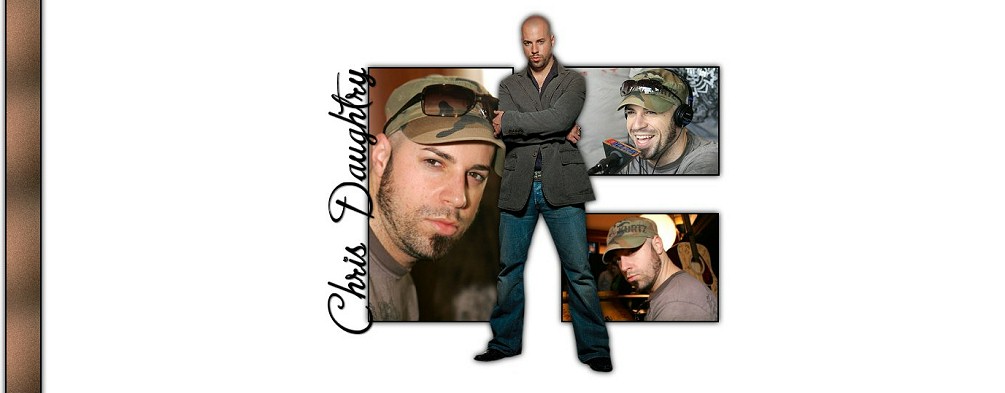
Crazy Selections Stationery Tutorial
Crazy Selections Stationery Tutorial


Things Needed:
**Paint Shop Pro ..This was done using 9
**My Selections Found Here
**Tube or Tubes of your choice
**Font of your choice (Optional)
**3 Graphics. One can be a taller than wide graphic and the other 2 should be wider than tall..
..Please note that all settings remain the same unless I state different settings..
~Graphic Preparation~
Graphic 1
The first graphic we will be using needs to be 196x346 (This is your taller graphic)
If you are a more advanced user, you can resize to meet these dimensions the way you would like to, or
you can follow my simple steps...
1. Open a new raster image 196x346
2. Next click on the your tall graphic (or graphic 1) and go Edit/Copy (and close out original)
3. Back to your raster image and Edit/Paste/Paste as a new layer
4. Image/Resize and resize your graphic down to where it looks ok inside this new raster image. Make sure resize all layers is not checked.
Use your mover tool to move the graphic around inside the raster image...
You may have to start off resizing at 70% or so and then resize again using a different percentage...
All graphics are different sized so I can't give specifics here as to what you will exactly need to do...
When you get your graphic to fit into this new raster image though and it looks good, go to Adjust/
Sharpness/Sharpen and then Layers/Merge/Merge Visible. This graphic is now all set so you can put
it aside on your workspace.
Graphic 2
Your second graphic needs to be be 212x146
1. Open up a new raster image 212x146
2. Edit/Copy your graphic 2 (and close out original)
3. Back to your raster image and paste as a new layer...
Again resize down and when you are done, sharpen it and then merge visible on the layers. Set this
graphic aside on your workspace.
Graphic 3
Your third graphic needs to also be 212x146
1. Open up a new raster image 212x146
2. Edit/Copy your graphic 3
3. Back to your raster image and paste as a new layer...
Again resize down and when you are done, sharpen it and then merge visible on the layers. Set this
graphic aside on your workspace.
~Graphics are done, now on to your Header~
1. Open new raster image 600x600
2. Flood fill with white

3. Layers/New Raster Layer
4. Selections/Load Save Selections-Load Selections From disk and choose the LGBox1_JM
Selection
5. Flood fill with black and then go to Selections/Modify/Contract by 2
6. Make your Image 1 active (or your long graphic), and go to Edit/Copy--You can now minimize this graphic but
don't close it out, we will need it for your background...
7. Back to your Raster image and go to Edit/Paste/Paste Into Selection and then select none
8. Effects/3D Effects/Drop Shadow with the following settings:
V&H=0, Opacity=100, Blur=12, Color=Black
9. Layers/New Raster Layer
10. Selections/Load Save Selections-Load Selections From disk and choose the LGBox2_JM
Selection
11. Flood fill with black and then go to Selections/Modify/Contract by 2
12. Make your Image 2 active and go to Edit/Copy--You can now close it out
13. Back to your Raster Image and go to Edit/Paste/Paste into Selection and then select none
14. Effects/3D Effects/Drop Shadow
15. Layers/New Raster Layer
16. Selections/Load Save Selections-Load Selections From disk and choose the LGBox3_JM
Selection
17. Flood fill with black and then go to Selections/Modify/Contract by 2
18. Make your Image 3 active and go to Edit/Copy--You can now close it out
19. Back to your Raster Image and go to Edit/Paste/Paste into Selection and then select none
20. Effects/3D Effects/Drop Shadow
21. Now you can add your tube or tubes...A tall tube looks great in the middle of the boxes,
but you can add yours where they look the best. You can add the same drop shadow to your tubes
too, or use one of your own. You can also add any text you'd like and your watermark. I chose to
add my text to the left hand side of my long graphic. I also used the following as a drop
shadow on my text:
V&H=1, Opacity=45, Blur=2, Color=Black (or you can use your own)
**Now you can either leave the white as your background or you can go with a color from one
of your graphics that compliments nicely. If you would like to keep the white background you can go to
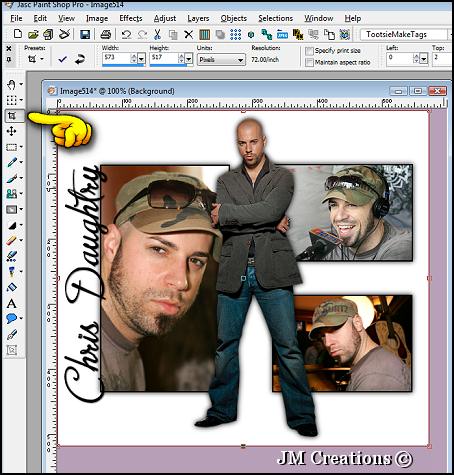
Layers/Merge/Merge All Flatten. Next click on your crop tool and crop off the excess white...

If you'd like to add a color instead, highlight and make your bottom layer (white background layer) active.
Now go to Edit/Clear. Flood fill with the color you would like and then merge all layers and do the cropping..
Now go to Edit/Clear. Flood fill with the color you would like and then merge all layers and do the cropping..
Save your header by going to File/Export and export to JPEG Optimizer and optimize at 15 or whatever
works best for your graphic...
works best for your graphic...
~Time to make the Background~
1. Bring up your Image 1 that you minimized from your header and go to Edit/Copy (You can now close this out)
2. Open a new Raster Image 50x300 and flood fill with black
3. Selections/Select All and then Selections/Modify/Contract by 2
4. Edit/Paste/Paste into Selection
5. Adjust/Blur/Gaussian Blur at 25
6. Adjust/Add-Remove Noise/Add Noise:
Gaussian, 10, Monochrome is checked --- and then select none
7. Effects/Image Effects/Seamless Tiling and make sure Corner and Vertical are checked
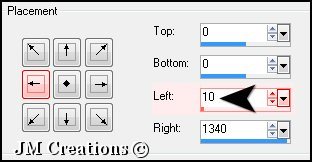
8. Image/Canvas Size and make it 1400x300 (If you use something larger than 1400 width for your resolution, you can adjust this width to suit your needs.)
The Position is Left Middle and then where it says "Left" change
it to 10. Please see screenshot below:

9. Effects/3D Effects/Drop Shadow:
V&H=0, Opacity=100, Blur=12, Color=Black Make sure Shadow on New Layer is Checked
V&H=0, Opacity=100, Blur=12, Color=Black Make sure Shadow on New Layer is Checked
10. Effects/Image Effects/Seamless tiling and make sure corner and vertical are checked
11. Layers/Merge/Merge Visible
12. Layers/New Raster Layer and flood fill with either white or a color if you added a color to your header background (use the same color you used for the header back).
Move this layer to the bottom by going to Layers/Arrange/Send to Bottom...
13. Layers/Merge/Merge All (Flatten)
14. File/Export and export to the JPEG optimizer at the same settings I mentioned earlier 15.
Arrange in Letter Creator and please link tutorial back to me at
http://www.jmcreationtuts.iwarp.com
Please feel free to snag and share my tutorials after they have been released but please credit back to me in the footer..
If you are a tutorial writer and you would like to use my selections, masks, or other things please email me at
jodim@norwaymi.com
I do allow it, but I require a link back in your tutorial to my website here:
http://www.jmcreationtuts.iwarp.com