Selection Fun Stationery Tutorial
Selection Fun Stationery Tutorial
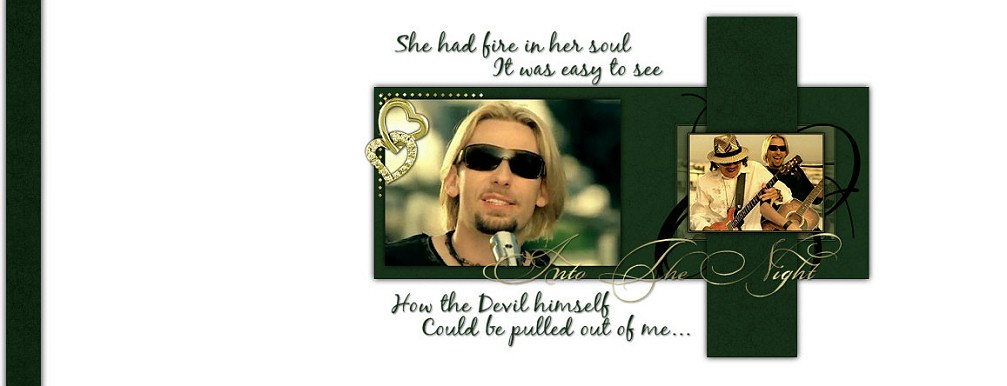

Things Needed:
***Paint Shop Pro (This was done using Version 9)
***2 Graphics of your choice (ones that are wider than tall must be used)
***Font or Fonts of choice
***My Corners (or you can use your own)
***My Selections found Here
Please install the selections into your Program Files/Jasc/PSP/Selections Folder before opening up PSP
The Header Preparation:
Before we begin, we are going to prepare your graphics and also set your color choices..
For best results I am going to have you resize your graphics to what my sizes are...
**1. Open both graphics in Paint Shop Pro. We are going to be resizing the first graphic that will be the larger one that is placed on the left side of your header. This graphic needs to be 318x225.
**2. If you are more advanced, you can crop your graphic and resize to get it these dimensions or you can open a new transparent raster image 318x225.
**3. Next while your first graphic is active, go to Edit/Copy (you can now close out this graphic)
**4. Back to the new raster image and go to Edit/Paste/Paste as a New Layer
**5. Resize your graphic down to where it fits in this raster image good. When resizing do not have "Resize All Layers" Checked. After resizing, make sure you also sharpen by going to Adjust/Sharpness/Sharpen. When it looks good inside this new raster image go to Layers/Merge/Merge Visible and you can now minimize this graphic for later...
**6. Now bring up your second graphic. The same resizing options apply to this one, except we need this one to be 215x156 so please open a new raster image 215x156 and repeat steps above. Copy your graphic and paste it into this new raster image. Resize down and sharpen. When you are done, merge visible on the layers.
**7. The last step for the preparation is to choose 2 colors from your graphics. Colors of the same shade will look best. One needs to be a lighter color which you need to set as your foreground and the other color needs to be a medium/darker color which you need to set as your background in your color palette.
~Please note that all settings remain the same unless otherwise noted~
Prep is now done...On to the Header!
1. Open new raster image 700x500
2. Flood fill with white
(Flood fill settings: Match Mode=None, Blend Mode=Normal, Opacity=100)
If you do not like white backgrounds, you can add the lighter color from your graphic that you chose in step 7 above...
3. Layers/New Raster Layer
4. Selections/Load-Save Selections/ Load the LongBox1_JM Selection
(The only things checked in there should be Source Luminance and Replace Selection...)
5. Flood fill with your dark color
6. Effects/Texture Effects/Fine Leather and then Selections/Select None
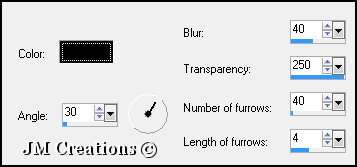
7. Effects/3D Effects/Drop Shadow:
V&H=0, Opacity=100, Blur=12, Color=Black
V&H=0, Opacity=100, Blur=12, Color=Black
8. Layers/New Raster Layer
9. Selections/Load Save Selections/Load From Disk and load the LongBox2_JM selection
10. Bring up the first graphic and go to Edit/Copy and you can now close this graphic out, we won't be using it again..
11. Back to your main image and go to Edit/Paste/Paste Into Selection and then select none ...
12. Add a drop shadow using the settings we used earlier:
V&H=0, Opacity=100, Blur=12, Color=Black
13. Now bring up your second graphic and go to Edit/Copy ( you can now close this graphic out, we won't be using it again)
14. Layers/New Raster Layer
15. Selections/Load Save Selections and load the LongBox3_JM Selection
16. Flood fill with Black and then go to Selections/Modify/Contract by 1
17. Flood Fill with your lighter color and then Selections/Modify/Contract by 1
18. Flood Fill with black and then Selections/Modify/Contract by 1
19. Edit/Paste/Paste as a new layer and postion your second graphic over your active selection
20. Selections/Invert and then Edit/Clear and you can select none...
21. Close off all layers except your top 2 that we just created. X the eye on the other layers so that only the top
2 layers are showing. Click on the top layer to make it the active layer and then go to Layers/Merge/Merge Visible
22. Effects/3D Effects/Drop Shadow
V&H=0, Opacity=100, Blur=12, Color=Black
23. Now we need a copy of this graphic with the borders around it so go to Edit/Copy and then Edit/Paste and
Paste as a new Image (and either minimize this image or set it aside for now, we will need it shortly)
24. You can now open up all the layers again and
then lower the opacity of this top merged layer to 30
Then go to Layers/Merge/Merge Visible
25. Layers/New Raster Layer
26. Load/Save Selections and load the LongBoxSquiggle_JM selection
27. Flood fill with Black and then Select None
28. Layers/New Raster Layer
29. Selections/Load Save Selections and load the LongBox4_JM Selection
30. Flood fill with your medium/dark color
31. Effects/Texture Effects/Fine Leather
32. Selections/Select None
33. Effects/3D Effects/Drop Shadow using the same settings:
V&H=0, Opacity=100, Blur=12, Color=Black
34. Now bring up your second small graphic we copied and set aside. Go to Image/Resize and resize it 85%
then go to Adjust/Sharpness/Sharpen and then Edit/Copy
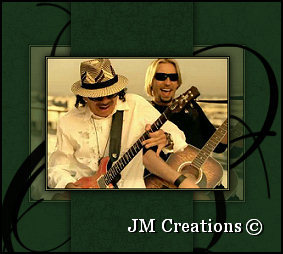
35. Back to main image and paste as a new layer...Postion it on top of the first one we did and lowered the opacity on:
36. Layers/Merge/Merge Visible
You can now add any text you'd like to it and also your watermark...
You can add your own drop shadow to your text or use the one I use:
V&H=1, Opacity=50, Blur=2, Color=Black
You can add your own drop shadow to your text or use the one I use:
V&H=1, Opacity=50, Blur=2, Color=Black
Another Optional thing to add are corners. If you would like to add them, you can use the ones I have made or your own :)
I have only added one to this header, but another example is below:
I have only added one to this header, but another example is below:
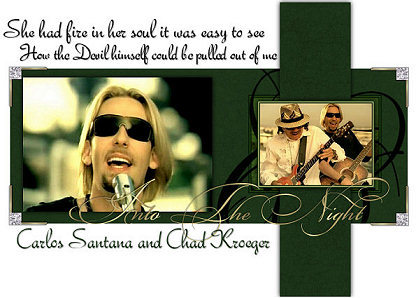
When you are done, you can either leave it the size it is or resize it 80-85%. I wouldn't recommend resizing any smaller than
this though because the pixel quality will look really bad :)
When you are done resizing and then going to Adjust/Sharpness/Sharpen, go to File/Export and Export to the JPEG Optimizer...
Optimize at 15 (or whatever works best for your graphic)
Now Let's Make the Background!!
1. Open a new raster image 40x300
2. Flood fill with your dark color and go to Effects/Texture Effects/Fine Leather
3. Effects/Image Effects/Seamless tile and make sure Corner and Vertical are checked
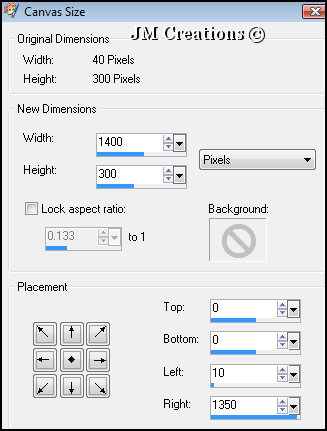
4. Image/Canvas Size and Canvas Size 1400x300 (If you use a larger screen resolution, you can adjust this to make it bigger to accomodate your settings)
Your Left margin should be set at 10. You can do this by clicking on the left middle arrow and then on the right where it has the "Left" margin settings, change it
to 10:
5. Effects/3D Effects/Drop Shadow using the settings below...Make sure Shadow on new layer is checked:
V&H=0, Opacity=100, Blur=12, Color=Black
V&H=0, Opacity=100, Blur=12, Color=Black
6. Effects/Image Effects/Seamless Tile using Corner and Vertical
7. Layers/Merge/Merge Visible
8. Layers/Add New Raster Layer
9. Flood fill this new raster layer with white and then move this layer down
10. Layers/Merge All Flatten and then Export to the JPEG Optimizer and optimize using the same settings as earlier :)
Arrange in Letter Creator and please link tutorial back to me at
http://www.jmcreationtuts.iwarp.com
Please feel free to snag and share my tutorials after they have been released but please credit back to me in the footer..
If you are a tutorial writer and you would like to use my selections, masks, or other things please email me at
jodim@norwaymi.com
I do allow it, but I require a link back in your tutorial to my website here:
http://www.jmcreationtuts.iwarp.com