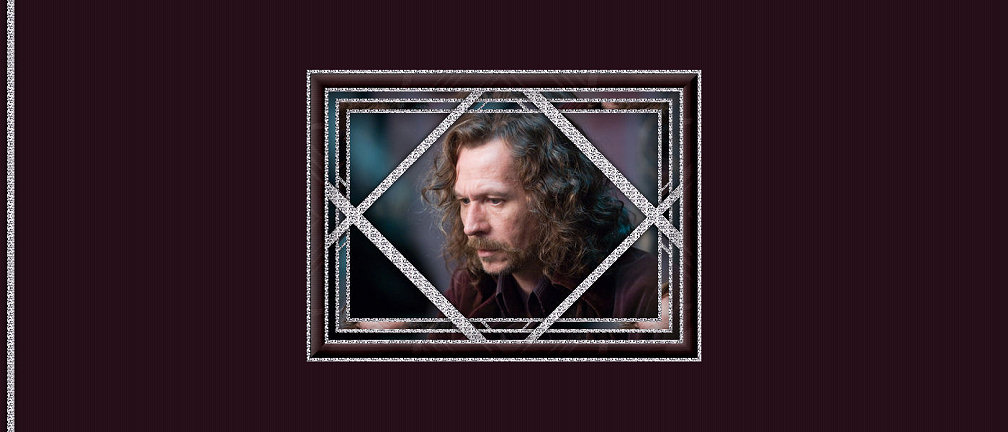
Diamond Frame and SB Tutorial Set
Diamond Frame and SB Tutorial Set

Things Needed:
**Paint Shop Pro (this was done using v.9)
**Diamonds Pattern Found Here (this is my creation so please do not change file name)
**Simple Filters (Diamonds) found Here
**Graphic of your choice (needs to be wider rather than taller. It should also be at least 430 pixels in width) A square graphic or one that is taller will not turn out correctly....
Please note~All settings remain the same throughout tutorial unless otherwise stated
Before opening Paint Shop Pro, please put the Diamonds_JM Pattern fill into your PSP/Patterns folder and install the plugins needed if you don't already have them :)
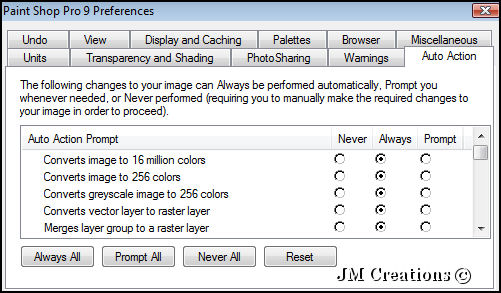
~Also please note that I have my PSP Preferences set to do things automatically. It is just easier:
The Frame:
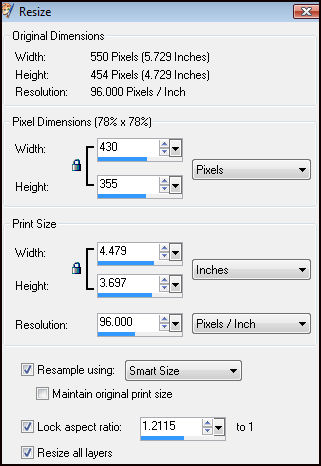
1. Open your graphic in Paint Shop Pro and resize your graphic to no more than 430 pixels in width. If your graphic is 430 or a little under there is no need to resize. Please resize using the following settings: (with lock aspect ratio checked, your graphics height will self adjust)
If you have resized, you may need to go to Adjust/Sharpness/Sharpen
2. Edit/Copy and then Edit/Paste/Paste as a new image. You can now minimize your original
3. Using your eye dropper tool, choose a medium to dark color from your graphic and set it as your foreground color. Set your Background color to the Diamonds_JM pattern
4. Image/Add Borders and add a 5 pixel border with a color not in your graphic and that is not white (this will be the color you will use to add a border with throughout tutorial)
5. Select border with magic wand
Mode=Replace, Match Mode=RGB Value, Tolerance=0, Sample Merged and Contiguous both checked, Feather Zero
6. Using your flood fill tool with the following settings,
Match Mode=None, Blend Mode=Normal, Opacity=100
fill your selected border with the diamonds pattern at Angle=0, Scale=100
7. Selections/Invert
8. Effects/3D Effects/Cutout with the following settings:
V&H=0, Shadow Color=Black, Opacity=40, Blur=45 and Select None
9. Image/Add Borders and add a 10 pixel border
10. Select border with magic wand
11. Edit/Paste/Paste into Selection
12. Effects/Plugins/Simple/Diamonds and Select None
13. Image/Add Borders and add a 5 pixel border
14. Select border with magic wand and then flood fill with the diamonds pattern
15. Selections/Invert
16. Effects/3D Effects/Cutout and then select none
17. Image/Add Borders and add a 10 pixel border
18. Select with magic wand and go to Edit/Paste/Paste into Selection
19. Image/Flip
20. Effects/Plugins/Simple/Diamonds
21. Flood fill selection with the Diamonds pattern
22. Effects/3D Effects/Drop Shadow:
V&H=0, Opacity=100, Blur=12, Color=Black and select none
23. Image/Add Borders and add a 5 pixel border
24. Select border with magic wand and then flood fill with the diamonds pattern
25. Selections/Invert
26. Effects/3D Effects/Cutout and select none
27. Image/Add Borders and add a 20 pixel border
28. Select border with magic wand and then go to Edit/Paste/Paste into Selection
29. Effects/Plugins/Simple/Diamonds
30. Layers/New Raster Layer
31. Flood fill with the medium/dark color you have chosen and then in your layers palette, lower the opacity to between 85-90 (or whatever works best for you). Then go to Layers/Merge/Merge Down
32. Effects/Texture Effects/Blinds with the following settings:
Width=3, Opacity=15, Color=Black, Horizontal and Light From left/top both checked
33. Effects/BorderMania/Frame 2 with the following settings:
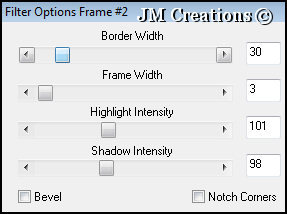
34. Selections/Select None
35. Image/Add Borders and add a 5 pixel border
36. Select border with magic wand and then flood fill with the diamonds pattern
37. Selections/Invert
38. Effects/3D Effects/Cutout
Repeat cutout but change the Vertical and Horizontal to -2 and then select none
You are now done with the frame/header...Please add any text you'd like and your watermark and then go to File/Export to JPEG optimizer and optimize at 15-20 or whatever your preference is...You can now close this too, we are done with it :)
The Background:
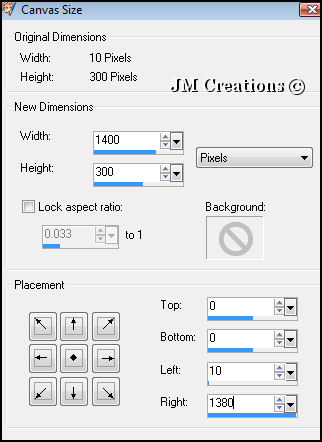
1. Open a new raster image 10x300 pixels
2. Flood fill with the diamonds pattern
3. Image/Canvas Size 1400x300. Left side placement is 10 (Click on the left middle arrow and then change the Left settings on the right to 10)
4. Effects/3D Effects/Drop Shadow (using the same settings we used previously:
V&H=0, Opacity=100, Blur=12, Color=Black
5. Effects/Image Effects/Seamless Tile

6. Layers/New Raster Layer and then move this layer to the bottom
7. Flood fill with the medium/dark color you chose
8. Effects/Texture Effects/Blinds with the following settings:
Width=3, Opacity=15, Color=Black, Light from left/top is checked (Horizontal is Not checked)
9. Layers/Merge/Merge All (Flatten)
You are now done!! Go to File/Export to the JPEG optimizer and optimize with the same settings you used previously...
Arrange in Letter Creator and please link tutorial back to me at
http://www.jmcreationtuts.iwarp.com
Please feel free to snag and share my tutorials after they have been released but please credit back to me in the footer..
If you are a tutorial writer and you would like to use my selections, masks, or other things please email me at
jodim@norwaymi.com
I do allow it, but I require a link back in your tutorial to my website here:
http://www.jmcreationtuts.iwarp.com