Simple Enough Stationery Tutorial
Simple Enough Stationery Tutorial

Things Needed:
**Paint Shop Pro - This was done using version 9
**Graphic of your Choice - One that is wider rather than taller will work best for instructions given. Graphic should be at least 450 pixels wide but if it is wider, instructions will be given to resize...
**Simple Filters - We will be using Horizontal Grain, Quick Tile, and Diamonds
**If you'd like my Heart Corners you can get them Here
~Please note that all settings remain the same once given unless otherwise noted~
~Before opening up Paint Shop Pro, please install the Simple Filters if you don't have them~
The Frame/Header:
1. Open your graphic of choice in Paint Shop Pro duplicate once. You can now close out the original. Then using your eye dropper tool, choose a light medium color from it. This will be used in your frame and also your background. Nothing too light or dark, but a nice medium color that is on the lighter side and that compliments your graphic well will work best...
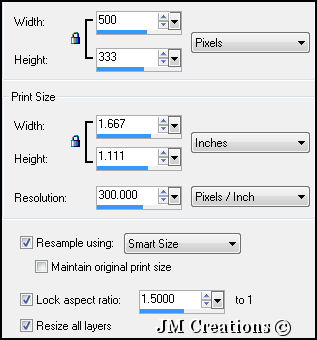
2. We need your graphic to be no wider than 500. So if it is, please go to Image/Resize and resize with the following settings (Please note, It is your choice to resize your graphic at either 450 or 500. Instructions will be given to resize it to 500 pixels wide~If you'd prefer 450, then adjust your width settings accordingly~
By checking "Lock Aspect Ratio, your height will self adjust and therefore your number will not be the same as mine for the Height.
Please set the width at 500 pixels, Resample Using Smart Size, Lock Aspect Ratio and Resize all layers are checked...
3. Adjust/Sharpness/Sharpen after the resize if needed
4. Edit/Copy and then Edit/Paste/Paste as a new image. You can now minimize one copy of your graphic. We will need it later to copy to the clipboard..
5. Image/Add Borders and add a 1 pixel symmetric black border
6. Image/Add Borders and add a 45 pixel symmetric white border
7. Select your white border with your magic wand tool with the following settings:
Mode=Replace, Match Mode=RGB Value, Tolerance=0, Sample Merged and Contiguous boxes both checked, Feather=0, and Outside (Anti Alias is Not Checked)
8. Effects/Plugins/Simple/Quick Tile
9. Effects/Plugins/Simple/Diamonds
10. Effects/Plugins/Horizontal Grain
11. Selections/Promote Selection To Layer
12. Layers/New Raster Layer and flood fill with the color you chose and Select None
13. Lower the opacity of this layer to 70
14. Layers/Merge/Merge Down
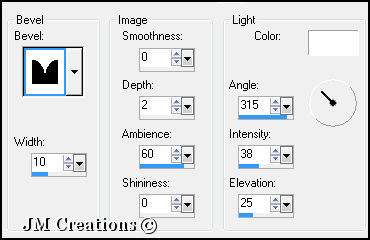
15. Effects/3D Effects/Inner Bevel with the following Settings:
16. Layers/Merge/Merge All (Flatten)
17. Before adding corners or any other tubes of your choice, we are going to use the custom selection to get our sideborder strip so please go to your Selection Tool, and then Custom Selection and use the following settings:
(For those not familiar on where to find Selection and Custom Selection, Your selection tool should be on the left hand side with your freehand and magic wand tools. Once you select the Selection tool, Custom Selection can be found up at the top. It is right next to the Anti-Alias box. If you move your cursor over it, it will say "Custom Selection"...Press this and then enter in the following settings)
Left=0, Top=142, Right=43, Bottom=425
18. Edit/Copy and then Edit/Paste/Paste as a new image and you can move this aside for right now. We will need it in a minute....
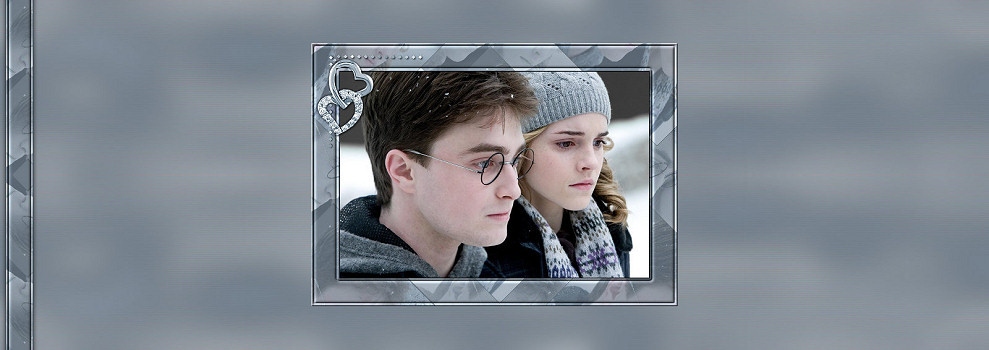
19. Now back to your Header/Frame. Remove the selection by going to Selections/Select None. You can now add any embellishment tubes of your choice, as well as your watermark.
I have added a heart corner and I applied a drop shadow to it of:
V&H=1, Opacity=50, Blur=2, Color=Black
20. When you are done with your Frame/Header go to File/Export and Export to the JPEG Optimizer and optimize at 15 to 20 or whatever works best for you....You can now either minimize this to resize and make a tag out of later or you can close it out. We won't be needing it again..
The Background:
1. Bring up the minimized copy of your graphic and go to Edit/Copy. You can now close this out, we won't be needing it again.
2. Make your Sideborder image that we custom selected from your graphic earlier the active image. Go to Effects/Image Effects/Seamless Tiling and use Corner and Vertical. Vertical Offset is -1 and Transition is 50
3. Image/Canvas Size and Canvas Size it 1600x283 (If your screen resolution is larger you can adjust the width to accomodate your needs)
Placement is Left Middle and on the right hand side where it says Top, Bottom, Left, and Right, please change the Left to 10
4. Effects/3D Effects/Drop Shadow with the following Settings:
V&H=0, Opacity=100, Blur=12, Color=Black, Shadow on new layer Is checked
5. Effects/Image Effects/Seamless Tiling
6. Layers/Merge/Merge Visible
7. Layers/New Raster Layer
8. Layers/Arrange/Send To Bottom
9. Selections/Select All
10. Edit/Paste/Paste Into Selection (this should be your graphic)
11. Selections/Select None
12. Effects/Image Effects/Seamless Tiling at Default:
Corner & Bi-Directional, Horizontal and Vertical Offset=0, Transition=50
13. Adjust/Blur/Gaussian Blur at 30
14. Effects/Image Effects/Seamless Tiling at Default Settings
15. Effects/Plugins/Simple/Horizontal Grain
16. Effects/Image Effects/Seamless Tiling using Corner and Vertical. Transition at 50
17. Layers/New Raster Layer and send this new layer to the bottom
18. Flood Fill with the color you chose
19. Lower the Opacity of your "Middle" layer or the one we added the Horizontal Grain settings to. You can tweak this to your liking and what works best for you. Somewhere between 50 and 60 worked best in testing though :)
20. Layers/Merge/Merge All (Flatten)
21. File/Export and Export to the JPEG Optimizer using the same settings you used for your Header/Frame....
Arrange in Letter Creator and you are done!!
Thanks so much for trying my tutorial.
I hope your results were great ones :)
Please feel free to snag and share my tutorials after they have been released but please credit back to me in the footer..
If you are a tutorial writer and you would like to use my selections, masks, or other things please email me at
jodim@norwaymi.com
I do allow it, but I require a link back in your tutorial to my website here:
http://www.jmcreationtuts.iwarp.com