Picture Fun Stationery Tutorial
Picture Fun Stationery Tutorial

Things Needed
***Paint Shop Pro (this was done using version 9 but should work fine with other versions)
***My Supplies (Picture Fun Template)
***3 Graphics of your choice (One graphic needs to be at least 550 pixels wide and 200 pixels high. The other two graphics need to be at least 255x240)
***Optional Plugin .. Eye Candy 4000 - Chrome which can be found Here
***Additional Tubes, Embellishments, Fonts etc that you would like to use (Optional)
~Please Note that all settings remain the same unless otherwise stated. Before Opening Paint Shop Pro, Please unzip the Supplies and extract the template to your deskop or somewhere else you can easily find it. Also please install the Plugin to your PSP/Plugins folder~
The Header
1. Open the Picture Fun Template in PSP along with any tubes or graphics you will also be using...Please minimize all but the Picture Fun Template..
2. Duplicate once and close out original. You can do this by hitting Shift + D on your keyboard.
3. My Terms of Use will be the active layer. After you have read it, you can right click on this layer in your Layers Palette and Delete
**This template is made for your stationery header and background to be white, however I know that
alot of people prefer colored header backs and matching backgrounds on their stationery.
If you would like to leave the template as is and have a white background on your stationery, please skip ahead to step 4
So if you would prefer a color you can do that before we start working on the header.
To do this, after you have gone through steps 1-3, click on your Magic Wand Tool and click somewhere on the white side or middle of the template.
Do Not click inside any of the boxes or the Wavy Divider though....You must click on the background itself.
For Magic Wand Settings, please refer to step 6 below (under the Header instructions).
After you have selected your background, flood fill with the color you would like. Black is not recommended, as your side border strip is going to be black.
For Flood Fill Settings, please refer to step 6 (under the Sideborder/Background instructions).
When you are done go to Selections/Select None**
4. Bring up the 3 graphics you will be using and decide where each one will be placed. Make your large graphic, or
the one that will go in the top box the active image and go to Edit/Copy. You can now minimize this....
5. Make the Picture Box Template the active image. Using your mover tool, click in the middle of the large top box (on the white)
6. Click on your Magic Wand Tool and make sure you have the settings set to:
Mode=Replace, Match Mode=RGB Value, Tolerance=0, Contiguous is checked, Feather=0, Anti-alias is checked, Outside. Click in the middle of the box to select it
7. Edit/Paste/ and then Paste as a new layer
8. Grab your Mover tool and position your image so it is within the box. If your image is too large, you can go to
Image/Resize and resize it (Make sure you resize using Smart Size, Lock Aspect Ratio is checked. Resize all Layers is Not checked).
9. When it fits within the selection good, then go to Selections/Invert and then Edit/Clear. Deselect by going to Selections/Select None. If you resized, you may want to go to Adjust/Sharpness/Sharpen..
10. Effects/3D Effects/Drop Shadow using the following settings:
H&V=0, Opacity=100, Blur=12, Color=Black
11. Grab your mover tool and click in the middle of the box in the bottom left corner.
12. Click on your Magic Wand Tool and click inside this box to select it
13. Bring up your second image and go to Edit/Copy. You can now minimize this...
14. Back to the Picture Fun Template and go to Edit/Paste and then Paste as a new layer
15. Click on your mover tool and position your graphic within the selected box like we did with the first one...
Again you may need to resize if your graphic is a little to big. When all looks good go to Selections/Invert and then Edit/Clear
16. Selections/Select None and if you resized you may want to sharpen
17. Effects/3D Effects/Drop Shadow
18. Click on your Mover Tool and click inside the middle of the box on the lower right side
19. Click on your Magic Wand Tool and click inside the box to select it
20. Bring up your last or 3rd graphic and go to Edit/Copy. You can now minimize this
21. Back to the Picture Fun Template and go to Edit/Paste and Paste as a new layer
22. Click on your Mover Tool again and postition your graphic within the selected box. Resize if needed and
then go to Selections/Invert and then Edit/Clear
23. Selections/Select None and if you resized you may want to sharpen
24. Effects/3D Effects/Drop Shadow
25. In your Layers Palette, click on the WavyDivider_JM layer to make it the active layer and then click on the eye to close this layer out...
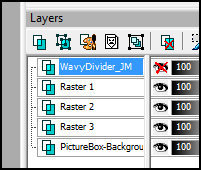
26. Now click on the bottom layer to make it the active layer and go to Layers/Merge/ and then Merge/Visible
27. Click back on the top layer or the WavyDivider_JM layer to make it the active layer and also open it back up by unchecking the eye...
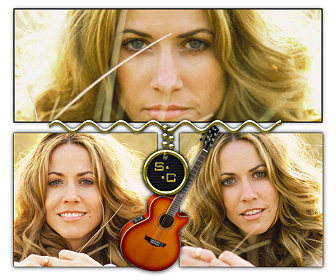
28. Now you have the option of making your wavy line a solid chrome (silver or gold), or you can instead add a color to the inside like this example: (Instructions on how to do both will be given. In order
to do the chrome, you have to have Eye Candy 4000 installed)

Instructions for making your Wavy Divider with a Chrome/Metal
1. Your Wavy Divider should be the active layer. Go to Effects/Plugins/Eye Candy 4000 - Chrome and use the following settings:
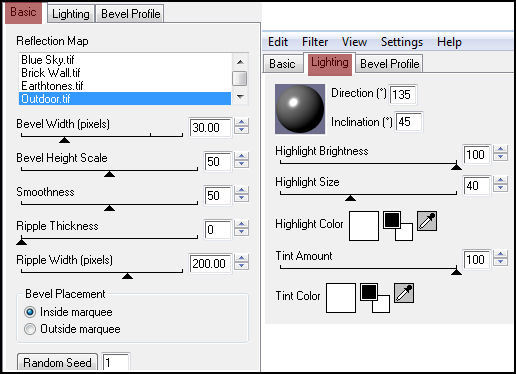
**Please note that the Chrome setting will make your Wavy Divider Silver/Chrome color. If you would like to change it to a Gold color, you do so by going to Adjust/Hue and Saturation/Colorize. You can use your own settings or you can use Hue=36 and Saturation=140**
~Continue to Step 29 below~
Instructions for making your Wavy Divider with a color of your choice
1. Set the color you would like to use in your Color Palette (you can set this color as your foreground color).
If you would like to pull a color from one of your graphics, click on your eye dropper tool and left click on your graphic..
2. Back to the Picture Fun Template and your Wavy Divider should be the active layer
3. Click on your magic wand tool and click inside on the white part of the Wavy Divider
4. Now click on your Flood Fill tool with the following settings and right click 2 or 3 times to flood fill..
Match Mode=None, Blend Mode=Normal, Opacity=100
5. While still selected go to Adjust/Add-Remove Noise and Add Noise with the following settings:
Gaussian is checked, Noise at 15, Monochrome is checked
6. Selections/Select None
~Continue to Step 29 below~
29. Effects/3D Effects/Drop Shadow
30. Edit/Copy and then Edit/Paste and Paste as a new image. We will be using this for the side border on your background..
31. Back to your Picture Fun Template
32. You can now move your Wavy Divider around if you'd like and you can also add any other tubes or embellishments that you would like.
When you are done, add your watermark and go to File/Export and export to the JPEG Optimizer and Optimize at 15 or whatever your preference is....
The Side Border/Background
1. Make the copy of the wavy divider the active image (this is the one we copied and pasted as a new image
earlier).
2. Image/Rotate/Free Rotate with the following settings:
Right, 90 Degrees, and All Layers is checked
3. Image/Resize and resize 70%. Resize using Smart Size. Also make sure Lock Aspect Ratio and Resize all Layers
is checked...
4. Image/Canvas Size and make it 40 wide and 375 in height. Placement is in the middle
5. Layers/New Raster Layer
6. Layers/Arrange/Send To Bottom and flood fill with black
Flood Fill Settings: Match Mode=None, Blend Mode=Normal, Opacity=100
7. Click on the top layer in the layers palette to make this the active layer. This will be your Wavy Divider layer
8. Effects/Image Effects/Seamless Tiling using the following settings:
Edge, Vertical, Width=60, Transition=50
9. Image/Resize and Resize it 60%
10. Click on the bottom (Black) layer in your layers palette to make this the active layer and go to Effects/Texture Effects/Blinds and use the following settings:
Width=2, Opacity=30, Color=light gray (#c0c0c0), Light from left/top is checked
11. Layers/Merge/Merge Visible
12. Image/Cavas Size and make it 48 wide by 225 in height. Placement is middle - left
13. Layers/Duplicate
14. Click on your mover tool and lightly click on your graphic once to select it (Click on the wavy part)
15. Using the right arrow on your keyboard, tap the arrow 24 times
16. Layers/Merge/Merge Visible
17. Image/Canvas Size 1400x225 (If your screen resolution is larger than 1400, please adjust to suit your needs) Click on the left middle arrow and then on the right side where it says Left, change it to 10
18. Effects/3D Effects/Drop Shadow with the following settings:
V&H=0, Opacity=100, Blur=12, Color=Black, Shadow on New Layer is Checked
19. Effects/Image Effects/Seamless Tiling using Corner and Vertical
20. Layers/Merge/Merge Visible
21. Layers/New Raster Layer
22. Layers/Arrange/Send To Bottom and flood fill with white
**or if you chose to replace the white background on the header with a color of your choice, then flood fill here with that same color**
23. Layers/Merge/Merge All Flatten
24. File/Export and Export to the JPEG Optimizer....
Arrange in Letter Creator and you are done!!
Thanks so much for trying my tutorial. I hope your results were great ones :)
Please feel free to snag and share my tutorials after they have been released but please credit back to me in the footer..
If you are a tutorial writer and you would like to use my selections, masks, or other things please email me at
jodim@norwaymi.com
I do allow it, but I require a link back in your tutorial to my website here:
http://www.jmcreationtuts.iwarp.com
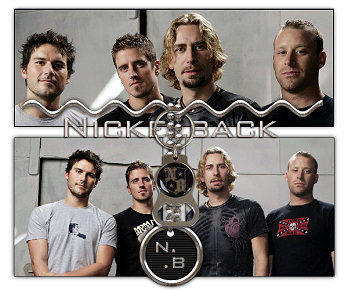
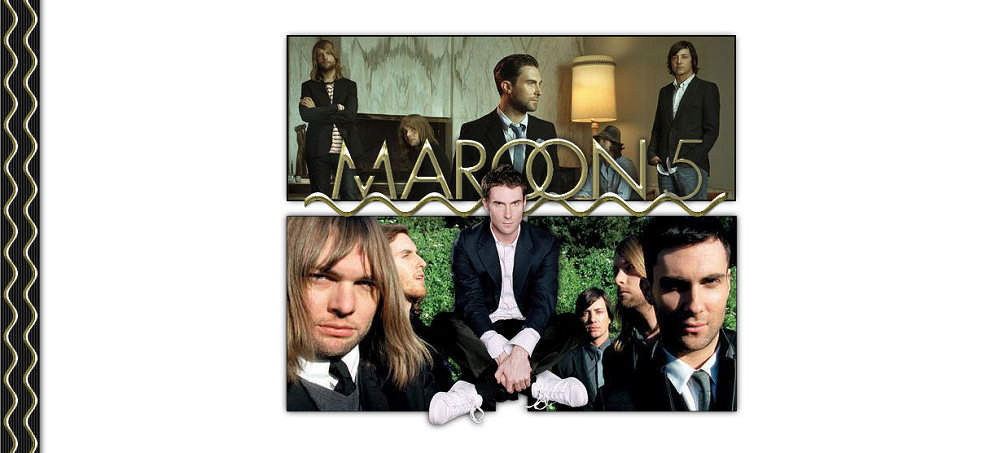
Some More Examples...
