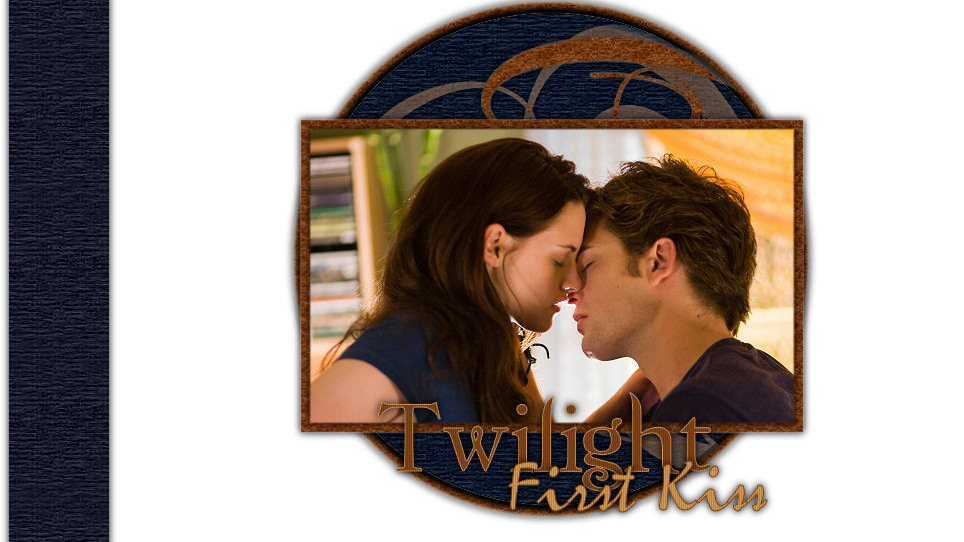
First Kiss Stationery Tutorial
First Kiss Stationery Tutorial


Things Needed:
**Paint Shop Pro (This was done using Version 9)
**A Graphic of your choice (one that is wider rather than tall will work best. It also needs to be at least 500 pixels wide)
**A Graphic of your choice (one that is wider rather than tall will work best. It also needs to be at least 500 pixels wide)
**My Selections (Found in my Supplies Zip)
~Please note that all settings remain the same unless otherwise stated~
~Before Opening up PSP, Please put the Selections in your PSP/Selections folder~
~Also please note that if you add a watermark to your header, you can do that before you save....It is your choice~
The Header
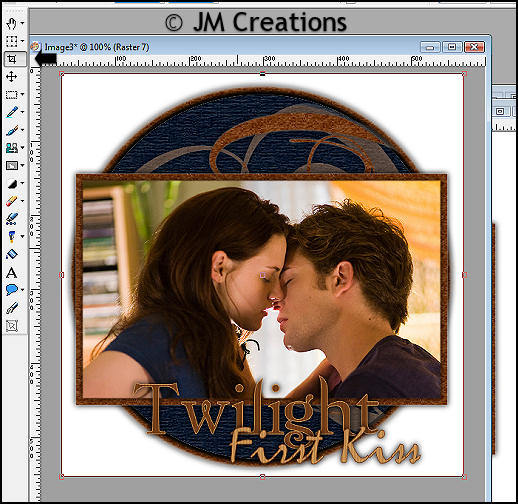
1. Open your graphic in PSP. Duplicate (Shift + D) once and close out original. Also open up the FirstKiss-Template_JM from the Supplies Zip and copy it once (Shift+D) and close out original. You can minimize or set aside for now...
2. Your graphic needs to be at least 500 pixels wide. If it is larger than 600 pixels in width, please resize by
going to Image/Resize and set the width to 600. Resize using Smart Size, Make sure Lock Aspect Ratio, and Resize all layers is checked.
3. If you have resized, you may want to sharpen by going to Adjust/Sharpness/Sharpen
4. Edit/Copy and then click on your eye dropper tool. Choose 2 colors from your graphic (Set one as the foreground and one as the background). You can now minimize your graphic...
~If your graphic disappears from your clipboard at any point, please bring it back up and copy it again~
5. Make your FirstKiss-Template_JM the active image..
~Optional choice here for your background. You can leave it white and have a white background stationery like mine or you can add a color to the background instead. If you want a color, highlight the background layer which is white and flood fill with the color of your choice~
Still on Step #5, the top "Circle" layer should be the active layer. If not, please make it the active layer...
6. Click on your magic wand tool with the following settings:
Mode=Replace, Match Mode=RGB Value, Tolerance=0, Sample Merged and Contiguous both checked, Feather=0, Anti-Alias is checked, Outside
7. Select the Circle with your magic wand by clicking in the middle..
8. Selections/Modify/Expand by 2
9. Selections/Modify/Feather by 1
10. Click on your flood fill tool and flood fill the selected Circle with one of the colors you have chosen...
Flood Fill Settings:
Match Mode=None, Blend Mode=Normal, Opacity=100
11. Selections/Select None
12. Effects/Plugins/Filters Unlimited 2/Paper Textures/Hemp 1 with the default settings (Intensity=128, Lightness=103)
13. Effects/3D Effects/Drop Shadow with the following settings
H&V=0, Opacity=100, Blur=12
14. Layers/New Raster Layer
15. Selections/Load-Save Selections/Load Selections From Disk and load the CBFrameSelections_JM
(Source Luminance and Replace Selection should be checked)
16. Click on your flood fill tool and flood fill with the other color you have chosen...
17. Effects/Plugins/Filters Unlimited 2/Paper Textures/Hemp 2 with the default settings (Intensity=128, Lightness=110)
18. Selections/Modify/Contract by 10
19. Edit/Paste/Paste as a new layer (this should be your graphic)
20. Use your Mover tool to position your graphic within the selection. When you are done and have it where you want it, go to Selections/Invert and then Edit/Clear
21. Selections/Select None
22. Effects/3D Effects/Drop Shadow (using same settings as previously used)
23. Layers/Merge/Merge Down
24. Effects/3D Effects/Drop Shadow
25. Over in the Layers Palette, click on the Background to make it the active image and then go to Layers/New Raster Layer...
26. Now Click on the "Circle" layer to make it the active layer
27. Selctions/Select All and then Selections/Float
28. Selections/Modify/Expand by 8
29. In your Layers Palette, Click on the layer below the "Circle" layer that you just created and Flood fill with the same color you used for your frame..
30. Effects/Plugins/Filters Unlimited 2/Hemp 2 and then Select None
31. Effects/3D Effects/Drop Shadow
32. Click on the "Circle" layer in your Layers Palette to make it the active layer and then go to Layers/New Raster Layer
33. Selections/Load-Save Selections/Load Selections From Disk and load the CBSwirlySelection_JM..
34. Flood Fill this new selection with the color you used for your frame (Click to flood fill a few times)..
35. Effects/Plugins/Filters Unlimited 2/Hemp 2 and then Select None
36. Using your mover tool, you can move this layer so it's as close to the side of your circle as you can get it...
37. Layers/Merge/Merge Visible...
38. You can now add any text that you would like (Optional)
39. When you are done adding your text please click on your Crop Tool and Crop around the Sides of your Header: Double click in the middle of your graphic to set it or the click Check Mark on top left..

40. File/Export and Export to the JPEG Optimizer and Optimize at 15 or whatever your preference is...
We are now done with the header...On to the Background!!
1. Open a new Raster image 100x300
2. Flood Fill with one of your color choices..
3. Effects/Plugins/Filters Unlimited 2/Hemp Paper 1
4. Effects/Image Effects/Seamless Tile and tile using Corner and Vertical, Vertical Offset is 0 and Transition is 50
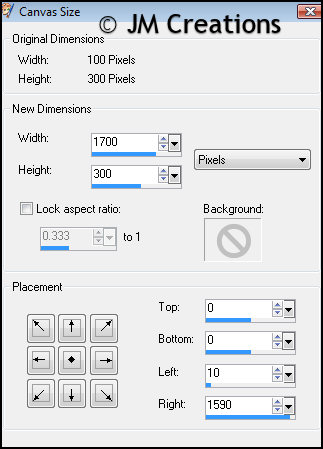
5. Image/Canvas Size and make it 1700x300 (If your resolution is wider than this, please adjust to accomodate your needs). Position is Middle Left arrow and over where it says "Left", change it to 10:

6. Effects/3D Effects/Drop Shadow with the following settings:
V&H=0, Opacity=100, Blur=12, Color=Black, Shadow on new layer is checked
7. Effects/Image Effects/Seamless Tile
8. Layers/New Raster Layer
9. Layers/Arrange/Send to Bottom
10. Flood Fill with White (or if you have added a color to your header background, add the same color here)
11. Layers/Merge/Merge All (Flatten)
12. File/Export and Export to the JPEG Optimizer and Optimize at 15 or whatever your preference is....
Arrange in Letter Creator and you are done!!
Thanks so much for trying my tutorial. I hope your results were great ones :)
Please feel free to snag and share my tutorials after they have been released but please credit back to me in the footer..
If you are a tutorial writer and you would like to use my selections, masks, or other things please email me at: jodimcreations@gmail.com
I do allow it, but I require a link back in your tutorial to my website here:
http://www.jmcreationtuts.iwarp.com
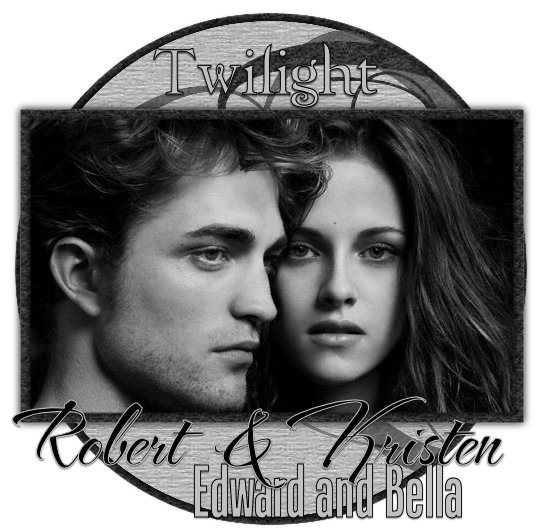
Another Example
