Rockstar Stationery Tutorial
Rockstar Stationery Tutorial
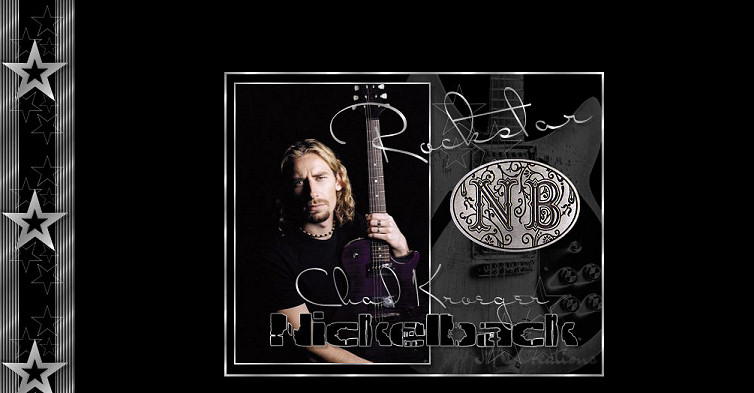

Things Needed:
Let's Get Started:
Please make sure you have imported the selection into your selections folder and either the Gold or Silver Pattern into your Patterns Folder in PSP before opening PSP. You can import both of the Patterns if you'd like but we will only be using one...Either Gold or Silver
1. Open your Graphic, Tubes, and star tubes in PSP...There are 2 star tubes included in my supplies zip. Whichever Pattern you are using, you can use the matching stars
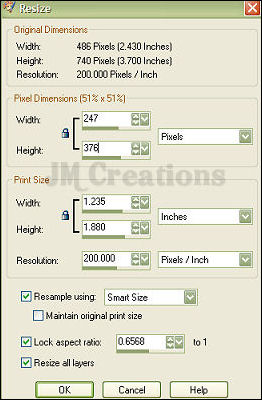
2. Resize your graphic so that it is 376 pixels in height. You can do this by going to Image/Resize with the following settings:
Make sure Lock Aspect Ratio is checked so your width will self adjust...
3. Adjust/Sharpness/Sharpen
4. Choose a Medium/Dark color from your graphic and set it as the foreground color.
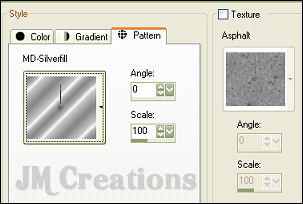
5. Set your background color to either your Silver or Gold Gradient. Settings are Angle 0/Scale 100
4. Choose a Medium/Dark color from your graphic and set it as the foreground color.
5. Set your background color to either your Silver or Gold Gradient. Settings are Angle 0/Scale 100
6. We are going to add a small border to your graphic so go to Image/Add Borders and add a 2 pixel border to your graphic in a color that isn't in your graphic..I am using white
7. Click on your Magic Wand with the following settings:
7. Click on your Magic Wand with the following settings:
Select your border using the magic wand set on the above settings...
8. Flood fill the selected border with your gold or silver pattern...
9. Selections/Select None
10. Edit/Copy
11. Open a new transparent image 500x400
12. Layers/New Raster Layer
13. Selections/Load Save Selection/Load Selections From Disk and choose the Picturebox_JM selection
14. Edit/Paste/Paste into Selection
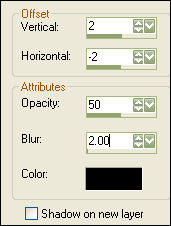
15. Effects/3D Effects/Drop Shadow and use the following settings:
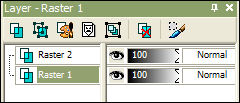
16. In your layers palette, highlight your bottom layer and flood fill with the color you chose earlier for your foreground color
17. Highlight the tube you have chosen to go with your graphic...and go Edit/Copy
18. Back to your new image and Edit/Paste/Paste As New Layer....
19. Use your mover tool to position your tube where you would like it....and in your Layers Palette reduce the opacity to where you think it looks best. You want it to show up but still be somewhat muted in the back. Somewhere between 25 and 40 should work best.
20. Now highlight either the Silver or Gold tube and Edit/Copy and back to your new image and Paste/Paste as a new layer..
21. Again use your mover tool and position it where you would like it...You don't have to use these stars, you can use whatever other accents you would like to. Also you can add as many or as few as you'd like to....It's all up to what you think looks best.
22. When you are done positioning your tubes, go to Layers/Merge Layers/Merge Visible
23. Now click on your Text tool and add your writing. You can use the same drop shadow we used earlier on your text also :0)
24. Once you are all done with your text go to Image/Add Borders and add a 3 pixel border in a color not in your graphic like we did earlier.
25. Select your border with the magic wand with the same settings are earlier....and Flood fill with your Silver or Gold Pattern.
26. Selections/Select None
27. Add your watermark then go to layers/merge layers/merge visible
28. File/Export/JPEG Optimizer and optimize at 20 and save...
Background
1. Open a new transparent image 100x200
2. Flood Fill with your Silver or Gold Pattern
3. Effects/Image Effects/Seamless Tiling
and make sure "Corner and Vertical" are the boxes you have ticked....
4. Effects/Texture Effects/Blinds
and use the following settings:
Width: 2, Opacity 100, Color is the color you chose earlier as your foreground color..and the only box that should be checked is light from left/top
5. Selections/Select All/ Modify/Contract by 20
6. Layers/New Raster Layer
7. Flood fill with the color you chose for your foreground color..
8. Selections/Select None
9. Effects/Image Effects/Seamless Tiling and use the same settings as we did earlier
10. Image/Canvas Size and make it 1400x200 and placement is middle left arrow
If your screen resolution is larger, you can change the 1400 width to accomodate your needs
11. Layers/Merge/Visible
12. Layers/New Raster Layer
13. Layers/Arrange/Send To Bottom
14. Flood Fill this layer with your Foreground Color that you chose earlier
15. Layers/Merge/Visible
16. You can add embellishments to the side if you would like to.....I used the siver stars
and then I used my star preset shape to make a couple more stars of solid color for mine...
17. When you are done, go to Layers/Merge/Merge Visible and export to the JPEG Optimizer at 20...Save and you're done!
Assemble parts in Letter Creator
Please link tutorial back to:
I hope you enjoyed this tutorial & your results were good ones :0)
Thank you to my testers at Crazy Creative Creators!!
Please feel free to snag and share my tutorials after they have been released but please credit back to me in the footer..
If you are a tutorial writer and you would like to use my selections, masks, or other things please email me at jodimcreations@gmail.com
I do allow it, but I require a link back in your tutorial to my website here:
Thanks
JodiM